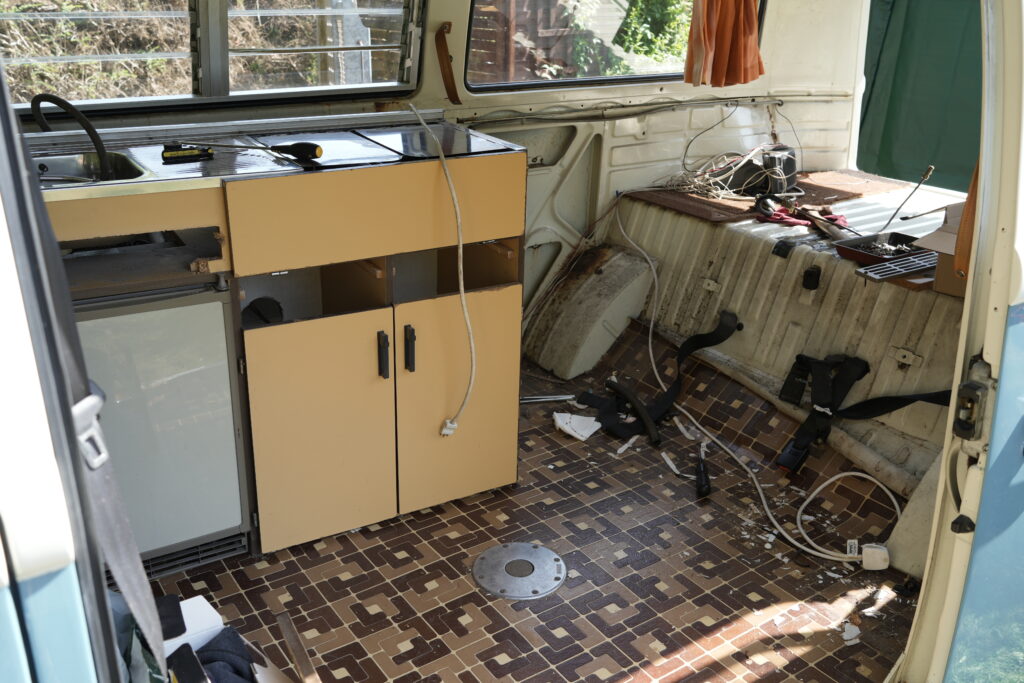
Took out the units, they were not held in by much and the conversion work from Devon looked very poor quality. Holes where the power cables went not being de-burred and grommets not fully in the holes, just one of the things.
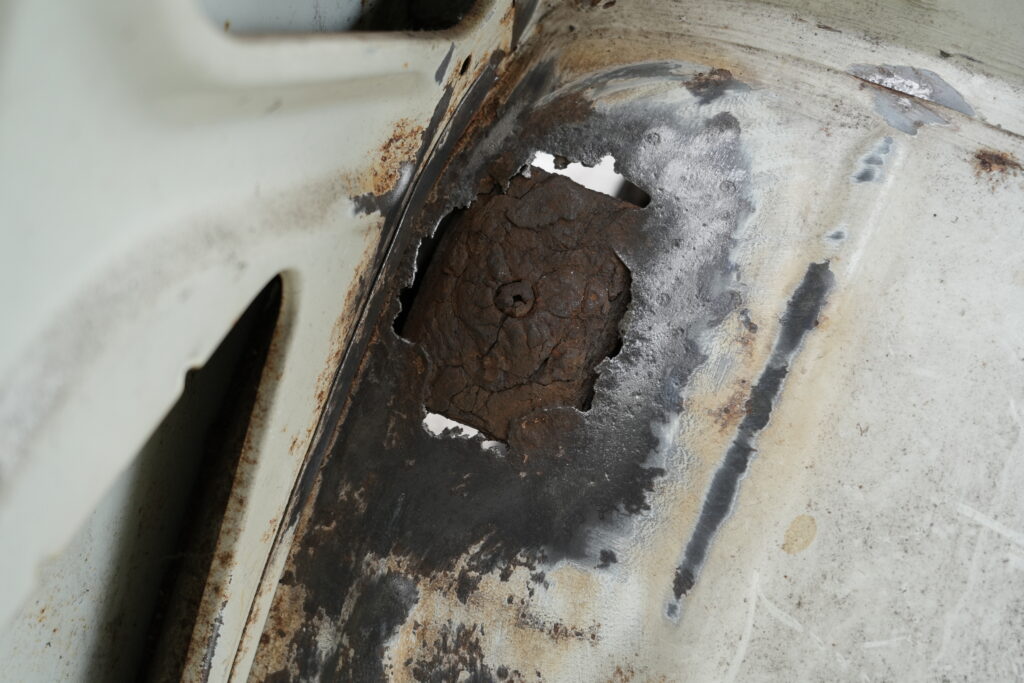
Anyway behind the units I can see the lower outer panel had been replaced. I cleaned up the area and repainted it plus welded a patch over the unused seat belt mount which was rusted through. The surface rust along the edge seems to be the result of leaking window and leaking water socket. The cupboards show a lot of water damage so I guess it leaked for years.
The outer repair needs some work. It was seems to be an old repair and the new paint has not stuck well to some areas of filler so there are a few bubbles along the edge. Now cracking and rusting.
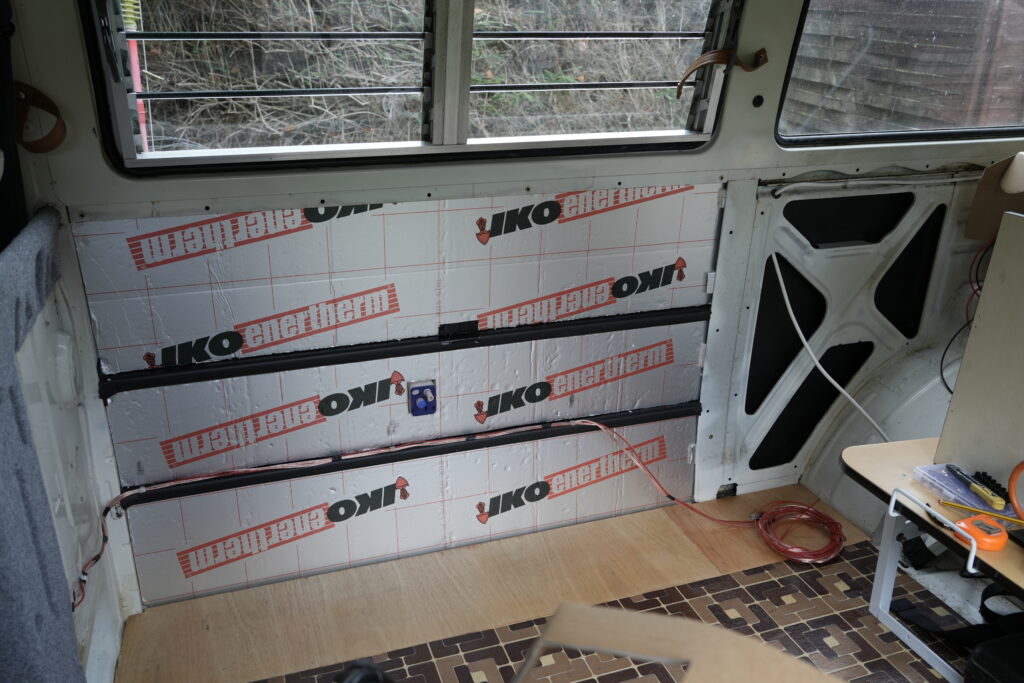
Sound proofing and insulation. This is a right controversial and well debated topic of on-line van conversions. There is a lot of misinformation and unjustified opinions but also between the dross some good info. I’m not sure where my approach lies but as a start I wanted to do something behind the units as once they are in I don’t intend to remove them.
I used Dodo Mat to provide some sound proofing and insulation. It’s closed cell, adhesive and really easy to apply. The basic one is 5mm and was cheap enough to give it a go. Over that, in just the area in the picture, I glued in some 1″ PIR board. A later post will continue with the insulation!
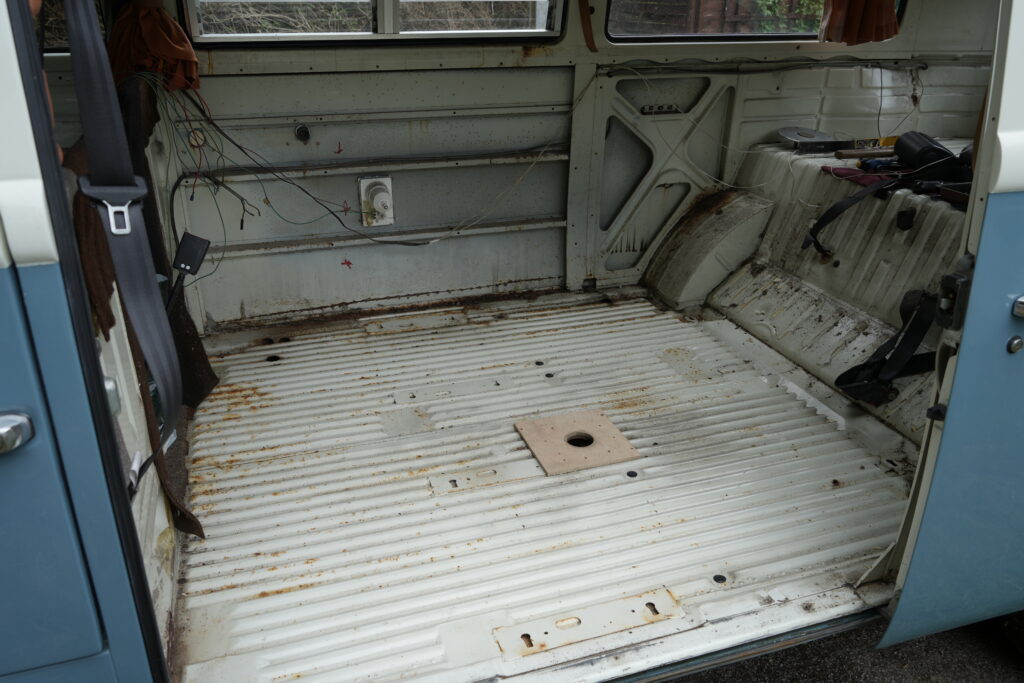
We retained the original 70’s floor with the part under the units trimmed off as it was a bit tatty. The ply is the same thickness and varnished to seal it. I didn’t add insulation under the floor and it’s not really going to be an all season camper so doesn’t need to meet the extreme’s of winter, off grid camping. Yep, I’m a fair weather camper 😉
Look closely and the wheel arch is fixed and lining material is on the bulkhead, all ready for the units….